Счетчик фпс фрапс как включить
Содержание:
Как пользоваться интерфейсом (настройки)?
Главное окно программы
Перейдем к разбору каждой вкладки. Начнем с первой – «Главное». Если у вас получилось русифицировать интерфейс, то вы увидите следующее окно:
В основной части окна приложения расположена информация о разработчике, сборке и версии
Обратите внимание на номер версии в правой части. Номер 3.5.99 свидетельствует о том, что вы используете самое последнее обновление Fraps
Ниже расположены параметры, позволяющие настроить режим работы:
- запуск программы в свернутом режиме на панели задач;
- закрепление поверх любых других окон;
- включение/отключение возможности запуска вместе со стартом Windows.
А немного ниже еще две настройки:
- мониторинг Windows Aero. При включении функции появляется возможность записывать рабочий стол.
- минимизация на панели задач. При закрытии окна на «крестик» приложение сворачивается в системную панель.
Вкладка «FPS»
Теперь переходим к главному функционалу. Для пояснения названия раздела расшифруем аббревиатуру FPS – Frames Per Second. Frames Per Second – это количество кадров в секунду, отображаемых на экране в текущий момент. Данный показатель является основным при измерении производительности игр с любого компьютера.
Итак, во вкладке «FPS» находятся следующие настройки:
- папка для хранения тестов. Здесь отображается путь к директории, куда Fraps сохраняет логи с результатами тестов. Вы можете поменять конечную папку или перейти к ней по кнопке «Просмотр».
- проверка производительности. Тут назначается клавиша для включения/отключения функции теста. Можно задать другую кнопку или полностью выключить опцию.
- настройки теста. Этими тремя пунктами выбирается содержимое тестирования. По вашему усмотрению в логах будет сохранятся частота и время кадров, а также полный журнал со статистикой.
- остановка теста. Если активировать этот пункт и задать нужное время в секундах, то спустя выбранный срок тестирование автоматически закончится. Запись в лог тоже прекратится.
Эти параметры отвечают за настройку записи теста и отображаемой информации. Во второй половине окна можно выбрать местоположение оверлея:
- смена положения оверлея. Выбор клавиши для перемещения счетчика ФПС.
- выбор положения оверлея. Можно перемещать счетчик по всем 4 углам или вовсе отключить его.
- частота обновления каждую секунду.
Вкладка «Видео»
Настройки данного раздела позволяют записывать видео с экрана. Вы можете снимать ролики с рабочего стола, в окнах и любых играх. Программа позволяет «фрапсить» любые игры – проекты из Steam, сервера «САМП», популярный «Скайрим» и так далее. Вне зависимости от того, используется лицензия или пиратка.
Рассмотрим возможности раздела. Настраивать видео можно следующими функциями:
- папка для хранения. Как и в случае с выбором папки для логов с тестами, выбирается директория, где копятся все записи.
- Захват видео. Выбор клавиши для старта/стопа и полное выключение опции.
- Настройки видео. Частота кадров при записи экрана (60/50/30/29.97) и смена размера видео позволяет не только поменять качество, но и снизить нагрузку на компьютер при записи.
- Обновление буфера. По умолчанию 30 секунд.
- Разделение на файлы по 4 Гб.
Помните, что при использовании пробной версии вы ограничены по длине видеозаписи. Рекомендуем скачать полный активированный вариант, чтобы вести запись бесконечно. Единственным препятствием может стать количество места на жестком диске, поскольку ролики из Fraps весят крайне много.
Справа во вкладке «Видео» есть звуковые параметры:
- настройки звука (стерео, многоканальный и совместимость с Windows 7);
- запись внешнего ввода позволяет добавить микрофон или веб-камеру;
- выбор клавиши для активации захвата звука с внешнего устройства.
И в самом низу окна есть еще 3 параметра, влияющих на запись:
- скрыть/показать курсор при записи;
- заблокировать частоту кадров;
- захватывать RGB без потерь.
Вкладка «Скриншоты»
С помощью настроек этого раздела можно сделать скриншот. Здесь выбираются все необходимые параметры:
- путь к папке для хранения изображений;
- назначение клавиши для создания снимка;
- выбор формата изображения;
- отображение оверлея на скриншоте;
- повторный захват экрана с заданным промежутком времени (позволяет делать серию снимков).
Дополнительных окон с настройками и скрытыми параметрами Fraps не имеет – все необходимое перечислено выше в инструкции. Теперь научимся правильно использовать весь функционал по назначению.
Скачайте Fraps для Windows 10 на русском бесплатно
| Версия | Платформа | Язык | Размер | Формат | Загрузка |
|---|---|---|---|---|---|
| * скачайте бесплатно Fraps для Windows, файл проверен! | |||||
|
Fraps Pro 3.5.99 |
Windows 10 |
Русский | 3.67MB | .exe |
Скачать |
Обзор Fraps
Fraps (Фрапс) – программное обеспечение, предназначенное для замера и вывода на экран в реальном времени количества кадров в секунду (FPS). Утилита работает в фоновом режиме, поверх окон запущенных приложений, в которых производится замер. Программа совместима с играми, в основе которых используются технологии OpenGL и DirectX.
Скриншоты
Похожие программы
Adobe Flash Player — программа для воспроизведения flash-контента
Sony Vegas Pro — создание многодорожечных видео и аудио записей
Xvid Video Codec — библиотека для сжатия видео в стандарте MPEG-4
KMPlayer — мощный проигрыватель файлов звуковых и видеоформатов
Aimp — музыкальный проигрыватель с хорошим эквалайзером
SopCast — просмотр видео и аудиотрансляций в Интернете
iTools
Audacity — звуковой редактор, поддерживающий работу с несколькими дорожками
Reason
Camtasia Studio — программа для захвата видеоизображения с монитора компьютера
Windows Media Player — проигрыватель видео и аудио файлов от Microsoft
VLC Media Player — бесплатный кроссплатформенный медиапроигрыватель
DirectX — пакет библиотек, необходимый системе для работы с мультимедиа
Adobe Premiere Pro — программное обеспечение для нелинейного видеомонтажа
Adobe Audition
VKMusic — поиск и скачивание музыки из ВКонтакте, RuTube и YouTube
Windows Live Movie Maker
Fraps
K-Lite Codec Pack — набор кодеков для воспроизведения видео и аудиофайлов
Winamp — проигрыватель мультимедиа c поддержкой потокового контента
Realtek HD — пакет драйверов, предназначенный для HD Audio кодеков
Unity Web Player
MorphVOX Pro
VirtualDub
Freemake Video Converter
DivX — набор кодеков и утилит для воспроизведения аудио и видео
Adobe After Effects
Bandicam — программа для снятия скриншотов и записи видео с экрана
Ableton Live Suite
Steinberg Cubase
Pinnacle Studio — программа для обработки видео файлов
Movavi Video Editor — утилита для монтажа видеофайлов
iMovie — бесплатный видеоредактор от компании Apple
Sound Forge
Ace Stream Media
Virtual DJ — программа, имитирующая пульт диджея для микширования музыки
Action!
PowerDVD — проигрыватель мультимедийных файлов
GOM Player — медиапроигрыватель для Windows
Format Factory
CyberLink PowerDirector — видеоредактор с возможностью захвата видео с внешних источников
Finale
JetAudio — плеер с хорошим эквалайзером
Corel VideoStudio — профессиональный видеоредактор от компании Corel
Free Studio — пакет объединяющий более 40 мультимедийных программ
Avidemux — для создания новых и обработки готовых видео
Edius — программное обеспечение для нелинейного монтажа видео
ManyCam
Kodi — программа для воспроизведения мультимедиа
Daum PotPlayer — плеер с поддержкой всех мультимедийных форматов
ФотоШОУ PRO — программа для создания из фотографий видеороликов и слайд-шоу
Guitar Pro
MIRO
Shortcut
Light Alloy — бесплатный медиаплеер
GeForce Experience — автоматического поиск драйверов видеокарт компании Nvidia
HyperCam
Magix Music Maker — утилита для записи и обработки музыкальных дорожек
VideoPad Video Editor — частично бесплатный видеоредактор
Proshow Producer — условно-бесплатная программа для создания слайд-шоу
Free Video Editor — бесплатный видео редактор для нелинейного видео монтажа
Wondershare Filmora — условно-бесплатная программа для работы с видеофайлами
Zune
Аудио | Видео программы
Графические программы
Microsoft Office
Игры
Интернет программы
Диски и Файлы
FPS (Frames Per Second)

What do the options do?
The Overlay Display Hotkey lets you assign a button that will toggle the frame rate counter between the four corners and off. To change the Hotkey, click in the box and type a new key to be assigned this function. Clicking Disable will stop the Hotkey from having any effect.
The Benchmarking Hotkey lets you assign a button that can be used to determine the average frame rate between any two points in a game. To change the Hotkey, click in the box and type a new key to be assigned this function. Clicking Disable will stop the Hotkey from having any effect.
The overlay corner indicates the region of the screen that the framerate counter will be displayed in. Choose a corner that doesn’t obstruct important information in the game’s display. If you select Disabled the frame rate counter will not be displayed on screen.
Selecting «Only update overlay once a second» will only change the frame rate counter once a second.
Selecting «Save frame rate to file each second» will output the frame rate once a second to the file FRAPSSEC.TXT in your Fraps directory. This option is deprecated and has been removed in Fraps 2.7.0. Use the detailed FPS statistics option to get individual CSV files for each benchmark run.
The «Stop benchmark automatically» option allows you to specify a fixed duration for the benchmark. Once the number of seconds has elapsed the benchmark will automatically stop and the results will be written to disk.
Finally, detailed benchmark statistics can also be saved to disk. These are written in standard CSV files that can be imported directly into a spreadsheet. All files are automatically named/timestamped and saved in the benchmarks subdirectory. Currently there are 3 files written for each benchmark when this option is enabled:
- FPS — Contains the frame rate value for each second of the benchmark
- frametimes — Contains the time (in milliseconds) of every frame that was rendered in the benchmark
- minmaxavg — Contains the total frame count, benchmark duration, minimum, maximum, and average frame rate values.
How can I average the framerate between two points?
While in the game press the key you assigned to the Benchmarking Hotkey. This will mark the start of where averaging is to take place. A green box is displayed to let you know that logging has begun, and then the counter is removed for maximum accuracy. When you want to end the benchmark, press the Hotkey again. The average framerate will now be displayed in a red box. Full details are also saved in the file FRAPSLOG.TXT in your Fraps folder, and into the benchmark directory if you have detailed statistics enabled.
What is the maximum framerate Fraps will show?
Fraps will show a maximum framerate of 9999 fps on screen. If you need to know precise framerates above this you must use benchmarking and find out the value from FRAPSLOG.TXT, or from the detailed statistics (if you have this option enabled).
Why doesn?t Fraps show above 30fps, 60fps, 75 fps (or any other framerate) in my game?
This can be due to several reasons.
Many games have internal limits that prevent them rendering faster than a certain framerate. In some cases this can mean they are locked at a maximum framerate of only 30fps.
Another possibility is that you have Vsync enabled. Vsync is used to synchronise the output of your graphics card with the display of your monitor. When your graphics card has finished rendering the next frame it waits for the monitor to finish displaying the current one before switching to the new one. This means that the maximum framerate you can obtain will be equal to the refresh rate of your monitor (which is usually 60hz, 75hz, 85hz, or 100hz).
If you disable Vsync then your graphics card will continuously render without waiting for the last frame to be displayed in its entirety. With fast graphics cards this means that your monitor may switch to a new frame halfway down the screen. This effect is known as tearing as there appears to be a visible line separating two different halves. Due to this, you should generally leave Vsync enabled except when benchmarking.
Что является нормой
Если уровень показателя в телепроизводстве и киносъемках важен только специалистам – обычный зритель может не заметить разницы, то норма FPS в играх стоит особняком. Каждый геймер должен понимать, какую частоту обновления кадров выбрать, чтобы максимально насладиться процессом.
Что еще нужно знать о том, какой FPS оптимальный для игры? Если цифра падает ниже отметки 30, стабильное качество не получить. Медленные, не динамичные приложение, где не играет роли скорость реакции, могут отлично работать на 30-50.
Никакой разницы между 60 и условные места вы не увидите, если ваш монитор не поддерживает соответствующее разрешения, а видеокарта не разогнана до нужной мощности. Поэтому остановимся на отметке 60!
Сколько должно быть FPS в играх – выяснили. Если показатель падает ниже 30, играть вообще не имеет смысла.
Tips
-
If you want to see where the clip/screenshot is currently saved, go to either the Movies or Screenshots tab. To the right of ‘Folder to save movies/screenshots’ in, to the right of ‘Change,’ click the «View» button.
Thanks!
-
If you are using the paid version, consider using a timer to keep track of how long your recording is, especially if you are uploading videos and you are uploading to a site that has a time duration limit.
Thanks!
-
Check the main site frequently for updates (usually new versions of the program).
Thanks!
-
You may need to change your hotkeys. To do this, click on the tab you want to change (Movies or Screenshots, usually), highlight the Video/Screen Capture Hotkey blank, and press your desired hotkey. After, it will be saved automatically.
Thanks!
-
The numbers on the corner of the screen are called the benchmark. On default settings, they keeps track on your FPS (frame rate, basically performance). To change the position of the benchmark, simply press the benchmark key found in the FPS tab while still in game.
Thanks!
-
To change where your screenshots and clips are placed, go to the either Movies or Screenshots tab. Then, to the right of ‘Folder to save movies/screenshots in,’ there is a button that says Change. Click that to change its location.
Thanks!
-
If you’re not sure whether recording is working or not, keep an eye on your FPS counter. If it is red, Fraps is recording the video.
Thanks!
-
The file created is usually huge. If you plan to upload it to YouTube or similar, put it into your favorite video editing program and export it. This will produce a manageable file that won’t take up all your system memory.
Thanks!
Submit a Tip
All tip submissions are carefully reviewed before being published
Thanks for submitting a tip for review!
Advertisement
FPS (Frames Per Second)

What do the options do?
The Overlay Display Hotkey lets you assign a button that will toggle the frame rate counter between the four corners and off. To change the Hotkey, click in the box and type a new key to be assigned this function. Clicking Disable will stop the Hotkey from having any effect.
The Benchmarking Hotkey lets you assign a button that can be used to determine the average frame rate between any two points in a game. To change the Hotkey, click in the box and type a new key to be assigned this function. Clicking Disable will stop the Hotkey from having any effect.
The overlay corner indicates the region of the screen that the framerate counter will be displayed in. Choose a corner that doesn’t obstruct important information in the game’s display. If you select Disabled the frame rate counter will not be displayed on screen.
Selecting «Only update overlay once a second» will only change the frame rate counter once a second.
Selecting «Save frame rate to file each second» will output the frame rate once a second to the file FRAPSSEC.TXT in your Fraps directory. This option is deprecated and has been removed in Fraps 2.7.0. Use the detailed FPS statistics option to get individual CSV files for each benchmark run.
The «Stop benchmark automatically» option allows you to specify a fixed duration for the benchmark. Once the number of seconds has elapsed the benchmark will automatically stop and the results will be written to disk.
Finally, detailed benchmark statistics can also be saved to disk. These are written in standard CSV files that can be imported directly into a spreadsheet. All files are automatically named/timestamped and saved in the benchmarks subdirectory. Currently there are 3 files written for each benchmark when this option is enabled:
- FPS — Contains the frame rate value for each second of the benchmark
- frametimes — Contains the time (in milliseconds) of every frame that was rendered in the benchmark
- minmaxavg — Contains the total frame count, benchmark duration, minimum, maximum, and average frame rate values.
How can I average the framerate between two points?
While in the game press the key you assigned to the Benchmarking Hotkey. This will mark the start of where averaging is to take place. A green box is displayed to let you know that logging has begun, and then the counter is removed for maximum accuracy. When you want to end the benchmark, press the Hotkey again. The average framerate will now be displayed in a red box. Full details are also saved in the file FRAPSLOG.TXT in your Fraps folder, and into the benchmark directory if you have detailed statistics enabled.
What is the maximum framerate Fraps will show?
Fraps will show a maximum framerate of 9999 fps on screen. If you need to know precise framerates above this you must use benchmarking and find out the value from FRAPSLOG.TXT, or from the detailed statistics (if you have this option enabled).
Why doesn?t Fraps show above 30fps, 60fps, 75 fps (or any other framerate) in my game?
This can be due to several reasons.
Many games have internal limits that prevent them rendering faster than a certain framerate. In some cases this can mean they are locked at a maximum framerate of only 30fps.
Another possibility is that you have Vsync enabled. Vsync is used to synchronise the output of your graphics card with the display of your monitor. When your graphics card has finished rendering the next frame it waits for the monitor to finish displaying the current one before switching to the new one. This means that the maximum framerate you can obtain will be equal to the refresh rate of your monitor (which is usually 60hz, 75hz, 85hz, or 100hz).
If you disable Vsync then your graphics card will continuously render without waiting for the last frame to be displayed in its entirety. With fast graphics cards this means that your monitor may switch to a new frame halfway down the screen. This effect is known as tearing as there appears to be a visible line separating two different halves. Due to this, you should generally leave Vsync enabled except when benchmarking.
Инструкция по работе
Вся инструкция, которую вы найдете ниже, покажет, как замерить частоту отображения экрана, произвести тест, записать видео из игры или сделать ее скриншот. В общем, как пользоваться программой. Приступаем.
Замеряем FPS
Для того чтобы начать запись просто переходим в игру (поддерживается как полноэкранное отображение, так и оконный режим) и жмем назначенную горячую кнопку. Сразу же в выбранном угле экрана отобразится показатель частоты кадров или ФПС. Как видите, у нас он имеет значение в 130 – 150 FPS.
Как известно, наибольшая нагрузка на видеокарту и процессор компьютера происходит в момент просчета сложных игровых сцен. В это время производительность, по идее, должна проседать, и Fraps отображать это.
Давайте же попробуем, для примера мы взяли игру Beam NG и хорошо разогнавшись, врезались в стену. Тут нужно немного пояснить: во время простой езды, все что нужно просчитать графическому процессору – это вращение колес.
При ударе об стену (вы сейчас сами в этом убедитесь) нагрузка на процессор и графическую подсистему возрастает в разы. Ведь чипам приходится просчитывать деформацию каждой детали, особенно в этой уникальной игре. В результате мы оказались правы и Frame Rate, в момент столкновения, просел чуть ли не в 2 раза.
Есть еще один способ проверить работу Fraps. Мы зашли в настройки игры и установили ограничение по частоте отображения в 60 кадров в секунду. Утилита отреагировала тотчас же. Результат перед вами.
Снизим показатель частоты еще. Теперь устанавливаем 30 FPS. Индикатор желтого цвета моментально отреагировал и показал новое значение с точностью до одного кадра.
Программа позволяет поменять расположение оверлея. Для того чтобы это сделать можно жать кнопку «F12» (назначается в разделе «FPS») или просто указать точку вывода цифры частоты кадров.
В результате наш индикатор «перекочевал» в левый нижний угол.
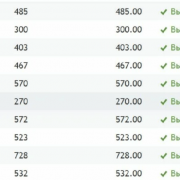
Если мы запустим тест производительности игры (включается назначенной в программном интерфейсе кнопкой) Fraps сохранит данные FPS в каталог, который открывается все из того же раздела «FPS». Открыв данный каталог, мы видим сразу несколько Excel-документов.
Рассмотрим каждый из отчетов более подробно. Изначально мы видим таблицу, в которую Фрапс записал минимальное значение кадров в секунду, его средний показатель и максимальный.
Следующий отчет менее полезен простым пользователям и сгодится разве что разработчикам игр. Тут указаны все кадры записанного Fraps отрезка и напротив каждого из них отображается время начала в миллисекундах.
Следующий файл уже текстовый. Тут мы можем найти такие данные:
- название записываемого приложения;
- общее количество кадров;
- длительность в миллисекундах;
- средний, максимальный и минимальный показатель FPS.
В отчете отображаются две сессии, так как они не создают новый документ, а дописываются в этот же файл. Итак, с замером частоты кадров игры мы закончили, теперь рассмотрим, как записать видео.
Как записывать видео с Фрапс
Снимать экран (Recording Video) через данное ПО в программе очень просто. Все что нужно сделать – это запустить приложение и нажать, используемую по умолчанию, «горячую» кнопку либо назначить ее самостоятельно. Естественно, поддерживается и запись звука с микрофона.
Делаем скриншоты игры
Для того чтобы сделать скриншот в Fraps, предпринимаем следующее:
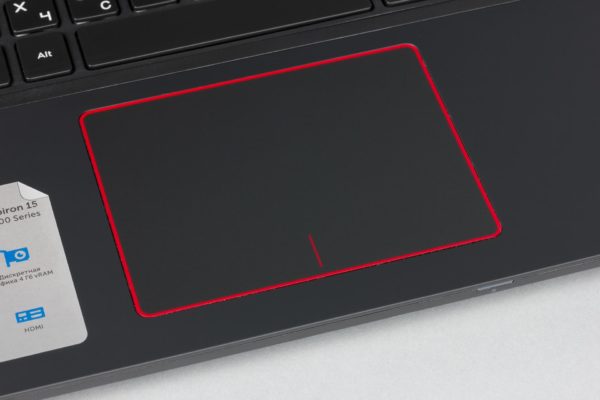
- Переключаемся на обведенную красной линией рамку.
- Указываем путь сохранения файлов или оставляем по умолчанию.
- Назначаем клавишу снимка.
- Выбираем формат.
Смотрите скриншот:
Теперь, когда вы запустите игру или приложение, снимок экрана будет создан сразу же после нажатия выбранной кнопки. Естественно, сохранится он в каталог, назначенный вами.
Контекстное меню Fraps Screen Capture
Для упрощения работы с основными функциям программы мы можем открыть ее контекстное меню. В нем получится быстро перейти к настройкам, открыть папку результатов тестов, посмотреть записанные видео или каталог со скриншотами.
Обзор Fraps
Fraps — один из самых популярных инструментов для геймеров, завоевавший свою репутацию из-за возможностей тестирования, позволяющих измерить производительность практически любой игры. С его помощью также можно отобразить счетчик частоты кадров в углу экрана, чтобы наблюдать за посекундной производительностью. К минусам приложения относится отсутствие русскоязычной локализации, так что скачать Fraps на русском языке не получится – инсталлятор доступен только на английском.
Интерфейс программы минималистичный, все функции понятны при первом запуске. Во вкладке «General» можно настроить запуск приложения вместе с системой и указать поведение софта во время работы (скрыть или отображать). Вкладка FPS отвечает за настройки счетчика фреймов. Здесь можно выбрать расположение отображения fps на экране монитора.
Параметры видеозаписей устанавливаются в разделе «Movies». Пользователю доступны настройки горячей клавиши запуска, также можно выбрать минимальный фрс или указать число вручную. Последняя вкладка «Screenshots» отвечает за параметры снятия скриншотов с рабочего стола ПК.
Fraps использует свой алгоритм оптимизации, поэтому видеоигры записываются с наилучшими показателями FPS. Единственным недостатком становится крупный размер видеофайла. Также пользователей может отпугнуть англоязычный интерфейс, так что, если вы хотите скачать полную версию Фрапс на русском языке, локализацию придется искать на специальных сайтах
Или обратить внимание на русскоязычные программы для захвата видео потока с экрана, например, Экранную Камеру
По умолчанию видео сохраняются со скоростью 30 кадров в секунду, но вы можете изменить это на предустановки на 60 или 50 или установить собственный предел. Чтобы начать запись экрана, нажмите F9 во время игры, а затем кликните ту же кнопку, чтобы остановить процесс. Именно простота управления и нетребовательность к системным ресурсам сделала программу такой популярной.
Последняя версия программы 3.5.9 доступна на официальном сайте, где вы можете скачать Fraps для Windows 10 и других версий системы. В пробном периоде накладывается ограничение на длительность записи в 30 секунд, а также присутствует водяной знак. Следует отметить, что приложение не оптимизировано под все новые функции виндовс 10, поэтому на этой сборке могут возникать ошибки в работе.
FPS (Frames Per Second)

What do the options do?
The Overlay Display Hotkey lets you assign a button that will toggle the frame rate counter between the four corners and off. To change the Hotkey, click in the box and type a new key to be assigned this function. Clicking Disable will stop the Hotkey from having any effect.
The Benchmarking Hotkey lets you assign a button that can be used to determine the average frame rate between any two points in a game. To change the Hotkey, click in the box and type a new key to be assigned this function. Clicking Disable will stop the Hotkey from having any effect.
The overlay corner indicates the region of the screen that the framerate counter will be displayed in. Choose a corner that doesn’t obstruct important information in the game’s display. If you select Disabled the frame rate counter will not be displayed on screen.
Selecting «Only update overlay once a second» will only change the frame rate counter once a second.
Selecting «Save frame rate to file each second» will output the frame rate once a second to the file FRAPSSEC.TXT in your Fraps directory. This option is deprecated and has been removed in Fraps 2.7.0. Use the detailed FPS statistics option to get individual CSV files for each benchmark run.
The «Stop benchmark automatically» option allows you to specify a fixed duration for the benchmark. Once the number of seconds has elapsed the benchmark will automatically stop and the results will be written to disk.
Finally, detailed benchmark statistics can also be saved to disk. These are written in standard CSV files that can be imported directly into a spreadsheet. All files are automatically named/timestamped and saved in the benchmarks subdirectory. Currently there are 3 files written for each benchmark when this option is enabled:
- FPS — Contains the frame rate value for each second of the benchmark
- frametimes — Contains the time (in milliseconds) of every frame that was rendered in the benchmark
- minmaxavg — Contains the total frame count, benchmark duration, minimum, maximum, and average frame rate values.
How can I average the framerate between two points?
While in the game press the key you assigned to the Benchmarking Hotkey. This will mark the start of where averaging is to take place. A green box is displayed to let you know that logging has begun, and then the counter is removed for maximum accuracy. When you want to end the benchmark, press the Hotkey again. The average framerate will now be displayed in a red box. Full details are also saved in the file FRAPSLOG.TXT in your Fraps folder, and into the benchmark directory if you have detailed statistics enabled.
What is the maximum framerate Fraps will show?
Fraps will show a maximum framerate of 9999 fps on screen. If you need to know precise framerates above this you must use benchmarking and find out the value from FRAPSLOG.TXT, or from the detailed statistics (if you have this option enabled).
Why doesn?t Fraps show above 30fps, 60fps, 75 fps (or any other framerate) in my game?
This can be due to several reasons.
Many games have internal limits that prevent them rendering faster than a certain framerate. In some cases this can mean they are locked at a maximum framerate of only 30fps.
Another possibility is that you have Vsync enabled. Vsync is used to synchronise the output of your graphics card with the display of your monitor. When your graphics card has finished rendering the next frame it waits for the monitor to finish displaying the current one before switching to the new one. This means that the maximum framerate you can obtain will be equal to the refresh rate of your monitor (which is usually 60hz, 75hz, 85hz, or 100hz).
If you disable Vsync then your graphics card will continuously render without waiting for the last frame to be displayed in its entirety. With fast graphics cards this means that your monitor may switch to a new frame halfway down the screen. This effect is known as tearing as there appears to be a visible line separating two different halves. Due to this, you should generally leave Vsync enabled except when benchmarking.
Fraps
Практически классическая программа для показа FPS в играх на Windows 10 – уже давно пользуется стабильным спросом у пользователей. Базовые функции доступны бесплатно, за расширенные возможности придется доплатить (покупка пожизненной лицензии).
Основная опция – отображение FPS в играх на Windows 10, счетчик закрепляется в выбранном вами углу. Дополнительно вы можете:
- Создавать скриншоты (сохраняются только в формате BMP);
- Записывать видео с ограничением по продолжительности, причем со звуком;
- Пользоваться горячими клавишами;
- Запускать по таймеру;
- Сохранять показатели фремрейта отдельным файлом.
Будьте внимательны, интерфейс не русифицирован. Впрочем, управление счетчиком настолько простое, что вы справитесь даже при минимальном знании английского.
FRAPS’s system requirements
You might already know that not only FRAPS but in fact, all software solutions have system requirements. Those are merely some specifications that your PC needs to meet before it can run a certain program. In this case, that program is FRAPS.
However, let’s not beat around the bush and take a look at the prerequisites. That way you’ll know for sure if your PC can run this tool or not. Granted you’re familiar with your PC’s specs, of course.
- Operating system: Windows 10, 8.1, 8, 7, Vista, 2003 and XP
- Architecture: both 32- and 64-bit
- CPU: all modern processors, starting from Pentium 4 and up (with SSE2 support)
- Graphics: AMD Radeon or NVIDIA GeForce recommended for best capture results
- Miscellaneous: requires you to grant it administrator rights when running it
As you can see, FRAPS is anything but pretentious. Meaning that you won’t need a supercomputer to run it. Long story short, if your PC is at least a Pentium 4 and can run Windows XP without a hiccup, you’re probably in the clear.