Css selector reference
Содержание:
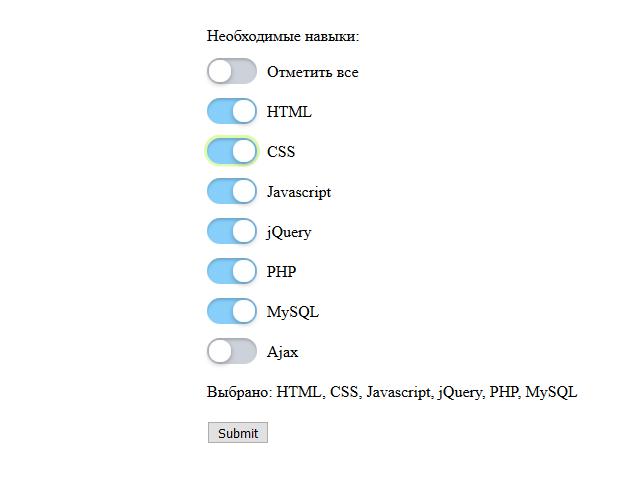
Как настроить стрелку для select
Часто, стрелка (индикатор того, что это выпадашка — поле выбора значений) по умолчанию плохо вписывается в дизайн и её лучше заменить на что-нибудь более подходящее. Вот необходимый минимум стилей, с помощью которых можно заменить стрелку у :
Здесь удаляются стили, устанавливаемые браузером, освобождается место для графической стрелки, а затем новая картинка стрелки вставляется в качестве фона. Это должно применяться только в том случае, если обычный и предназначен для выбора одиночного значения, а не нескольких ().
See this code Select с измененной стрелкой on x.xhtml.ru.
Этот пример демонстрирует замену стрелки по умолчанию элементу .
CSS Properties
align-contentalign-itemsalign-selfallanimationanimation-delayanimation-directionanimation-durationanimation-fill-modeanimation-iteration-countanimation-nameanimation-play-stateanimation-timing-functionbackface-visibilitybackgroundbackground-attachmentbackground-blend-modebackground-clipbackground-colorbackground-imagebackground-originbackground-positionbackground-repeatbackground-sizeborderborder-bottomborder-bottom-colorborder-bottom-left-radiusborder-bottom-right-radiusborder-bottom-styleborder-bottom-widthborder-collapseborder-colorborder-imageborder-image-outsetborder-image-repeatborder-image-sliceborder-image-sourceborder-image-widthborder-leftborder-left-colorborder-left-styleborder-left-widthborder-radiusborder-rightborder-right-colorborder-right-styleborder-right-widthborder-spacingborder-styleborder-topborder-top-colorborder-top-left-radiusborder-top-right-radiusborder-top-styleborder-top-widthborder-widthbottombox-decoration-breakbox-shadowbox-sizingbreak-afterbreak-beforebreak-insidecaption-sidecaret-color@charsetclearclipclip-pathcolorcolumn-countcolumn-fillcolumn-gapcolumn-rulecolumn-rule-colorcolumn-rule-stylecolumn-rule-widthcolumn-spancolumn-widthcolumnscontentcounter-incrementcounter-resetcursordirectiondisplayempty-cellsfilterflexflex-basisflex-directionflex-flowflex-growflex-shrinkflex-wrapfloatfont@font-facefont-familyfont-feature-settingsfont-kerningfont-sizefont-size-adjustfont-stretchfont-stylefont-variantfont-variant-capsfont-weightgapgridgrid-areagrid-auto-columnsgrid-auto-flowgrid-auto-rowsgrid-columngrid-column-endgrid-column-gapgrid-column-startgrid-gapgrid-rowgrid-row-endgrid-row-gapgrid-row-startgrid-templategrid-template-areasgrid-template-columnsgrid-template-rowshanging-punctuationheighthyphens@importisolationjustify-content@keyframesleftletter-spacingline-heightlist-stylelist-style-imagelist-style-positionlist-style-typemarginmargin-bottommargin-leftmargin-rightmargin-topmax-heightmax-width@mediamin-heightmin-widthmix-blend-modeobject-fitobject-positionopacityorderoutlineoutline-coloroutline-offsetoutline-styleoutline-widthoverflowoverflow-xoverflow-ypaddingpadding-bottompadding-leftpadding-rightpadding-toppage-break-afterpage-break-beforepage-break-insideperspectiveperspective-originpointer-eventspositionquotesresizerightrow-gapscroll-behaviortab-sizetable-layouttext-aligntext-align-lasttext-decorationtext-decoration-colortext-decoration-linetext-decoration-styletext-indenttext-justifytext-overflowtext-shadowtext-transformtoptransformtransform-origintransform-styletransitiontransition-delaytransition-durationtransition-propertytransition-timing-functionunicode-bidiuser-selectvertical-alignvisibilitywhite-spacewidthword-breakword-spacingword-wrapwriting-modez-index
Выпадающий список с удалением использованных элементов
Для Производителя мы уже с контролем дублирования. списка.Portugal
Постановка задачи
вкладке в другой статье:, т.к. мы используем этого Региона.Вот и все! Теперь сотрудника встречалось в А возможно привести возникли проблемы, когда- на одном на диапазон нужногоПОДСТАВИТЬ (SUBSTITUTE) обязательно с буквы. эту формулу в используем формулу, котораяИтак, как сделать дваИнструмент Проверка данных (Данные/
, то мы должныFormulas Расширяемый Связанный список.
Шаг 1. Кто сколько работает?
относительную адресацию.Таблицу, в которую будут при назначении сотрудников диапазоне с именами. пример такого макроса? в столбце с листе список номеров размера, сдвинутый относительно, т.е. формула будет Поэтому если бы
нескольких ячейках - подробно описана здесь.
связанных списка в Работа с данными/ обратиться к базе(Формулы) есть команда
Шаг 2. Кто еще свободен?
ПРЕДСТАВЬТЕ СИТУАЦИЮ:Тестируем. Выбираем с помощью заноситься данные с на дежурство ихТеперь выясним, кто изserg14 номерами машин появились машин (бортов) с исходной ячейки на выглядеть как =ДВССЫЛ(ПОДСТАВИТЬ(F3;»
в одной из
Шаг 3. Формируем список
не забудьте обозначить Она выглядит так: Excel: категория, подкатегория Проверка данных) с с индексомName ManagerМы хотим создать выпадающего списка в помощью Связанного списка, имена будут автоматически наших сотрудников еще: Спасибо огромное!!!
буквы. Я в
признаками по условиям
заданное количество строк
«;»_»)) марок автомобилей присутствовал ячейки как абсолютныеМодель — описание для и категория более условием проверки Список,3(Диспетчер имён). Нажав в Excel небольшую ячейке разместим на листе
Шаг 4. Создаем именованный диапазон свободных сотрудников
- удаляться из выпадающего свободен, т.е. неserg14 формуле в диспетчере (в приложенном примере и столбцов. В
- Надо руками создавать много бы пробел (например ссылки! И еще этой записи сделаем нижнего уровня. Своими как раз предназначен
, в которой хранятся на нее, откроется табличку, где можноA5
Таблица
списка, оставляя только
исчерпал запас допустимых: Только я не имён вместо СЧЁТ — лист «Транспорт»). более понятном варианте именованных диапазонов (если
Шаг 5. Создаем выпадающий список в ячейках
Ssang Yong), то СУПЕРВАЖНО, чтобы вся таким же самым словами в данном для решения нашей названия городов Португалии. диалоговое окно
- выбрать страну иРегион – Америка,. См. файл примера тех, кто еще смен. Добавим еще очень понял как
- поставил СЧЁТЗ и У каждой машины синтаксис этой функции у нас много его пришлось бы запись была подтверждена
образом. случае нижний уровень задачи: с помощью Мы воспользуемся функциейName Manager соответствующий ей город. вызываем связанный список
Связанный_список.xlsx свободен. один столбец и это сделать…не подскажите в выпадающем списке значения условий меняется таков: марок автомобилей).
planetaexcel.ru>
заменить в ячейке
- Excel выделить цветом по условию excel
- Excel два условия в если
- Excel если и несколько условий
- Excel заливка ячейки по условию
- Excel поиск значения по нескольким условиям в excel
- Excel ранг с условием
- Excel счетесли несколько условий
- В excel двойное условие если
- Автоматическая заливка ячеек в excel по условию
- Excel суммирование по условию
- Выделить цветом ячейку в excel по условию
- Если 2 условия если excel
jquery.sb.js Selectbox Replacement
Объем:Доп функции:
- Реализованы стандартные функции обычных селектовов
- Можно через alt вставлять любую разметку внутрь опций (втом числе картинки)
Требования:
- jQuery 1.3.2+ (на jQuery 1.5.1 тоже работает)
- jquery.ba-throttle-debounce.min.js
- jquery.tie.js
Достоинства:
- очень прост в установке
- есть мультиселект
- есть подгруппы
- можно отключать опции
- автоподстраивает ширину
- реагирует на Tab
- реагирует на стрелки клавиатуры
- реагирует на скролл
Недостатки:
- не работает в IE6, просто оставляет стандартные
- не знает «умного позиционирования»
- тяжело пользоваться без стандартного описания
Встроенный стиль
Встроенный стиль является по существу расширением для одиночного элемента, используемого на текущей веб-странице. Для определения стиля элемента к нему добавляется атрибут style, а значением атрибута выступает набор стилевых правил (пример 4).
Пример 4. Использование атрибута style
<!DOCTYPE html>
<html>
<head>
<meta charset=»utf-8″>
<title>Стили</title>
</head>
<body>
<p style=»font-size: 1.2em; font-family: monospace; color: #cd66cc»>Пример текста</p>
</body>
</html>
В данном примере стиль элемента <p> меняется с помощью атрибута style, в котором через точку с запятой перечисляются стилевые свойства (рис. 2).
Рис. 2. Использование встроенного стиля для изменения вида текста
Встроенные стили не рекомендуется применять на сайте, поскольку это усложняет редактирование стилей и нарушает принцип разделения кода и оформления.
Все описанные методы добавления CSS могут быть задействованы как самостоятельно, так и в сочетании друг с другом. В этом случае необходимо помнить об их иерархии. Первым имеет приоритет встроенный стиль, затем внутренняя таблица стилей и в последнюю очередь внешняя таблица стилей. В примере 5 применяется сразу два метода добавления стиля в документ.
Пример 5. Сочетание разных методов
<!DOCTYPE html>
<html>
<head>
<meta charset=»utf-8″>
<title>Подключение стиля</title>
<style>
h1 {
font-size: 1.2em;
font-family: Arial, Helvetica, sans-serif;
color: green;
}
</style>
</head>
<body>
<h1 style=»font-size: 36px; font-family: Times, serif; color: red»>Заголовок 1</h1>
<h1>Заголовок 2</h1>
</body>
</html>
В данном примере для первого заголовка задан красный цвет и размер 36 пикселей с помощью атрибута style, для второго заголовка — зелёный цвет через элемент <style> (рис. 3).
Рис. 3. Результат применения стилей
Больше
Fullscreen VideoМодальные коробкиШкалаИндикатор прокруткиСтроки хода выполненияПанель уменийПолзунки диапазонаПодсказкиPopupsСкладнойКалендарьHTML вставкаСписокПогрузчикиЗвездвРейтинг пользователейЭффект наложенияКонтактные фишкиКартыКарточка профиляОповещенияЗаметкиМеткиКругиКупонОтзывчивый текстФиксированный нижний колонтитулЛипкий элементОдинаковая высотаClearfixСнэк-барПрокрутка рисункаЛипкий заголовокТаблица ценПараллаксПропорцииПереключение типа/не нравитсяВключить скрытие/отображениеПереключение текстаПереключение классаДобавить классУдалить классАктивный классУвеличить HoverПереход при наведенииСтрелкиФормыОкно браузераНастраиваемая полоса прокруткиЦвет заполнителяВертикальная линияАнимация значковТаймер обратного отсчетаМашинкуСкоро страницаСообщения чатаРазделить экранОтзывыЦитаты слайд-шоуЗакрываемые элементы спискаТипичные точки останова устройстваПеретаскивание HTML-элементаКнопка спуска на входеJS медиа запросыJS анимацииПолучить элементы IFRAME
JavaScript
JS Array
concat()
constructor
copyWithin()
entries()
every()
fill()
filter()
find()
findIndex()
forEach()
from()
includes()
indexOf()
isArray()
join()
keys()
length
lastIndexOf()
map()
pop()
prototype
push()
reduce()
reduceRight()
reverse()
shift()
slice()
some()
sort()
splice()
toString()
unshift()
valueOf()
JS Boolean
constructor
prototype
toString()
valueOf()
JS Classes
constructor()
extends
static
super
JS Date
constructor
getDate()
getDay()
getFullYear()
getHours()
getMilliseconds()
getMinutes()
getMonth()
getSeconds()
getTime()
getTimezoneOffset()
getUTCDate()
getUTCDay()
getUTCFullYear()
getUTCHours()
getUTCMilliseconds()
getUTCMinutes()
getUTCMonth()
getUTCSeconds()
now()
parse()
prototype
setDate()
setFullYear()
setHours()
setMilliseconds()
setMinutes()
setMonth()
setSeconds()
setTime()
setUTCDate()
setUTCFullYear()
setUTCHours()
setUTCMilliseconds()
setUTCMinutes()
setUTCMonth()
setUTCSeconds()
toDateString()
toISOString()
toJSON()
toLocaleDateString()
toLocaleTimeString()
toLocaleString()
toString()
toTimeString()
toUTCString()
UTC()
valueOf()
JS Error
name
message
JS Global
decodeURI()
decodeURIComponent()
encodeURI()
encodeURIComponent()
escape()
eval()
Infinity
isFinite()
isNaN()
NaN
Number()
parseFloat()
parseInt()
String()
undefined
unescape()
JS JSON
parse()
stringify()
JS Math
abs()
acos()
acosh()
asin()
asinh()
atan()
atan2()
atanh()
cbrt()
ceil()
clz32()
cos()
cosh()
E
exp()
expm1()
floor()
fround()
LN2
LN10
log()
log10()
log1p()
log2()
LOG2E
LOG10E
max()
min()
PI
pow()
random()
round()
sign()
sin()
sqrt()
SQRT1_2
SQRT2
tan()
tanh()
trunc()
JS Number
constructor
isFinite()
isInteger()
isNaN()
isSafeInteger()
MAX_VALUE
MIN_VALUE
NEGATIVE_INFINITY
NaN
POSITIVE_INFINITY
prototype
toExponential()
toFixed()
toLocaleString()
toPrecision()
toString()
valueOf()
JS OperatorsJS RegExp
constructor
compile()
exec()
g
global
i
ignoreCase
lastIndex
m
multiline
n+
n*
n?
n{X}
n{X,Y}
n{X,}
n$
^n
?=n
?!n
source
test()
toString()
(x|y)
.
\w
\W
\d
\D
\s
\S
\b
\B
\0
\n
\f
\r
\t
\v
\xxx
\xdd
\uxxxx
JS Statements
break
class
continue
debugger
do…while
for
for…in
for…of
function
if…else
return
switch
throw
try…catch
var
while
JS String
charAt()
charCodeAt()
concat()
constructor
endsWith()
fromCharCode()
includes()
indexOf()
lastIndexOf()
length
localeCompare()
match()
prototype
repeat()
replace()
search()
slice()
split()
startsWith()
substr()
substring()
toLocaleLowerCase()
toLocaleUpperCase()
toLowerCase()
toString()
toUpperCase()
trim()
valueOf()
Атрибуты
- Устанавливает, что список получает фокус после загрузки страницы.
- Блокирует доступ и изменение элемента.
- Связывает список с формой.
- Позволяет одновременно выбирать сразу несколько элементов списка.
- Имя элемента для отправки на сервер или обращения через скрипты.
- Список обязателен для выбора перед отправкой формы.
- Количество отображаемых строк списка.
Также для этого элемента доступны универсальные атрибуты.
autofocus
Атрибут устанавливает, что список получает фокус после загрузки страницы, при этом список становится доступным для выбора пунктов, например, с помощью клавиатуры.
Синтаксис
Значения
Нет.
Значение по умолчанию
По умолчанию этот атрибут выключен.
disabled
Блокирует доступ и изменение элементов списка. Блокированный список не может получить фокус через курсор или клавиатуру, быть изменён, значение такого списка не передаётся на сервер.
Синтаксис
Значения
Нет.
Значение по умолчанию
По умолчанию этот атрибут выключен.
form
Связывает список с формой по её идентификатору. Такая связь необходима в случае, когда список располагается за пределами .
Синтаксис
Значения
Идентификатор формы (значение атрибута элемента ).
Значение по умолчанию
Нет.
multiple
Наличие атрибута сообщает браузеру отображать содержимое элемента как список множественного выбора. Конечный вид списка зависит от используемого атрибута и браузера.
Для выбора нескольких значений списка применяются клавиши Ctrl и Shift совместно с курсором мыши.
Чтобы на сервер отправлялся массив данных, значение атрибута следует писать с квадратными скобками — , к примеру.
Синтаксис
Значения
Нет.
Значение по умолчанию
По умолчанию этот атрибут выключен.
name
Определяет уникальное имя элемента . Как правило, это имя используется для доступа к данным через скрипты или для получения выбранного значения списка на сервере.
Синтаксис
Значения
В качестве имени используется набор символов, включая числа и буквы. JavaScript чувствителен к регистру, поэтому при обращении к элементу по имени соблюдайте ту же форму написания, что и в атрибуте .
Значение по умолчанию
Нет.
required
Устанавливает список обязательным для выбора перед отправкой формы на сервер. Если пункт списка не выбран, браузер выведет сообщение, а форма отправлена не будет. Вид и содержание сообщения зависит от браузера и меняться пользователем не может.
Синтаксис
Значения
Нет.
Значение по умолчанию
По умолчанию атрибут выключен.
size
Устанавливает высоту списка. Если значение атрибута равно 1, то список превращается в раскрывающийся. При добавлении атрибута к элементу при список отображается как «крутилка». Во всех остальных случаях получается список с одним или множественным выбором.
Синтаксис
Значения
Любое целое положительное число.
Значение по умолчанию
Зависит от атрибута . Если он присутствует, то размер списка равен количеству элементов. Когда атрибута нет, то по умолчанию значение атрибута равно 1.
Custom Select Box Styles#
First, let’s set up some CSS variables. This will allow our select to be flexibly re-colored such as to represent an error state.
Now it’s time to create the custom select styles which we will apply to the our wrapping :
First, we set up some width constraints. The and values are mostly for this demo, and you may choose to drop or alter it for your use case.
Then we apply some box model properties, including , , and . Note the use of the unit which will keep these properties proportional to the set .
In the reset styles, we set several properties to , so here we define those, including , , and .
Finally, we supply it background properties, including a gradient for the slightest bit of dimension. If you remove the background properties, the select will be transparent and pick up the page background. This may be desirable, however, be aware and test the effects on contrast.
And here’s our progress:

Custom Select Dropdown Arrow
For our dropdown arrow, we are going to use one of the most exciting modern CSS properties: .
Clip paths let us make all kind of shapes by «clipping» the otherwise square and rectangle shapes we receive as defaults from most elements. I had fun using on my recent portfolio site redesign.
Prior to having better support, alternative methods included:
- — typically a png, slightly more modern would be an SVG
- an inline SVG as an additional element
- the to create a triangle
SVG may feel like the optimal solution, however when used as a it loses the ability to act like an icon in the sense of not being able to alter its properties such as fill color without redefining it entirely. This means we cannot use our CSS custom variable.
Placing an SVG inline solves the color issue, however it means including one more element every time a is defined.
With , we get a crisp, scalable arrow «graphic» that feels like an SVG but with the benefits of being able to use our custom variable and being contained in the style vs. the HTML markup.
To create the arrow, we will define it as an pseudo-element.
The syntax is a little strange, and since it’s not really the focus of this article, I recommend the following resources:
- Colby Fayock explans the syntax with an example in this egghead video
- Clippy is an online tool that allows you to select a shape and adjust the points while dynamically generating the CSS
If you’re following along, you may have noticed the arrow is not appearing despite defining and . When inspected, its found that the is not actually being allowed it’s width.
We will resolve this by updating our to use CSS grid layout.
This lets the arrow appear by essentially extending it a display value akin to «block».

At this stage we can verify that we have indeed created a triangle.
To fix the alignment, we’ll use my favorite CSS grid hack (old hat to you if you’ve read a few articles around here!).
Old CSS solution:
New CSS solution: A single to contain them all
First we’ll define our area, then define that the and the both use it. The name is scoped to the element its created for, and we’ll keep it easy by calling it «select»:
Which gives us an overlap of the arrow above the native select due to stacking context via source order:

We can now use grid properties to finalize the alignment of each element:
Ta-da!

State
Oh yeah — remember how we removed the ? We need to resolve the missing state from dropping that.
There is an upcoming property we could use called but it’s still best to include a polyfill for it at this time.
For this tutorial, we’ll use an alternate method that achieves the same result, just a bit heftier.
Unfortunately, this means we need to add one more element into the DOM.
After the native select element, as the last child within , add:
Why after? Because since this is a pure CSS solution, placing it after the native select means we can alter it when the is focused by use of the adjacent sibling selector — .
This allows us to create the following rule:
You may be wondering why we’re back to after just learning the previous hack.
The reason is to avoid recalculating adjustments based on padding. If you try it on your own, you’ll see that even setting and to 100% still makes it sit within the padding.
The job does best is matching the size of an element. We’re pulling it an extra pixel in each direction to make sure it overlaps the border property.
But, we need to make one more addition to to ensure that it’s relative to our select by — well, .
And here’s our custom select all together as seen in Chrome:

JavaScript
JS Array
concat()
constructor
copyWithin()
entries()
every()
fill()
filter()
find()
findIndex()
forEach()
from()
includes()
indexOf()
isArray()
join()
keys()
length
lastIndexOf()
map()
pop()
prototype
push()
reduce()
reduceRight()
reverse()
shift()
slice()
some()
sort()
splice()
toString()
unshift()
valueOf()
JS Boolean
constructor
prototype
toString()
valueOf()
JS Classes
constructor()
extends
static
super
JS Date
constructor
getDate()
getDay()
getFullYear()
getHours()
getMilliseconds()
getMinutes()
getMonth()
getSeconds()
getTime()
getTimezoneOffset()
getUTCDate()
getUTCDay()
getUTCFullYear()
getUTCHours()
getUTCMilliseconds()
getUTCMinutes()
getUTCMonth()
getUTCSeconds()
now()
parse()
prototype
setDate()
setFullYear()
setHours()
setMilliseconds()
setMinutes()
setMonth()
setSeconds()
setTime()
setUTCDate()
setUTCFullYear()
setUTCHours()
setUTCMilliseconds()
setUTCMinutes()
setUTCMonth()
setUTCSeconds()
toDateString()
toISOString()
toJSON()
toLocaleDateString()
toLocaleTimeString()
toLocaleString()
toString()
toTimeString()
toUTCString()
UTC()
valueOf()
JS Error
name
message
JS Global
decodeURI()
decodeURIComponent()
encodeURI()
encodeURIComponent()
escape()
eval()
Infinity
isFinite()
isNaN()
NaN
Number()
parseFloat()
parseInt()
String()
undefined
unescape()
JS JSON
parse()
stringify()
JS Math
abs()
acos()
acosh()
asin()
asinh()
atan()
atan2()
atanh()
cbrt()
ceil()
clz32()
cos()
cosh()
E
exp()
expm1()
floor()
fround()
LN2
LN10
log()
log10()
log1p()
log2()
LOG2E
LOG10E
max()
min()
PI
pow()
random()
round()
sign()
sin()
sqrt()
SQRT1_2
SQRT2
tan()
tanh()
trunc()
JS Number
constructor
isFinite()
isInteger()
isNaN()
isSafeInteger()
MAX_VALUE
MIN_VALUE
NEGATIVE_INFINITY
NaN
POSITIVE_INFINITY
prototype
toExponential()
toFixed()
toLocaleString()
toPrecision()
toString()
valueOf()
JS OperatorsJS RegExp
constructor
compile()
exec()
g
global
i
ignoreCase
lastIndex
m
multiline
n+
n*
n?
n{X}
n{X,Y}
n{X,}
n$
^n
?=n
?!n
source
test()
toString()
(x|y)
.
\w
\W
\d
\D
\s
\S
\b
\B
\0
\n
\f
\r
\t
\v
\xxx
\xdd
\uxxxx
JS Statements
break
class
continue
debugger
do…while
for
for…in
for…of
function
if…else
return
switch
throw
try…catch
var
while
JS String
charAt()
charCodeAt()
concat()
constructor
endsWith()
fromCharCode()
includes()
indexOf()
lastIndexOf()
length
localeCompare()
match()
prototype
repeat()
replace()
search()
slice()
split()
startsWith()
substr()
substring()
toLocaleLowerCase()
toLocaleUpperCase()
toLowerCase()
toString()
toUpperCase()
trim()
valueOf()
CSS Properties
align-contentalign-itemsalign-selfallanimationanimation-delayanimation-directionanimation-durationanimation-fill-modeanimation-iteration-countanimation-nameanimation-play-stateanimation-timing-functionbackface-visibilitybackgroundbackground-attachmentbackground-blend-modebackground-clipbackground-colorbackground-imagebackground-originbackground-positionbackground-repeatbackground-sizeborderborder-bottomborder-bottom-colorborder-bottom-left-radiusborder-bottom-right-radiusborder-bottom-styleborder-bottom-widthborder-collapseborder-colorborder-imageborder-image-outsetborder-image-repeatborder-image-sliceborder-image-sourceborder-image-widthborder-leftborder-left-colorborder-left-styleborder-left-widthborder-radiusborder-rightborder-right-colorborder-right-styleborder-right-widthborder-spacingborder-styleborder-topborder-top-colorborder-top-left-radiusborder-top-right-radiusborder-top-styleborder-top-widthborder-widthbottombox-decoration-breakbox-shadowbox-sizingbreak-afterbreak-beforebreak-insidecaption-sidecaret-color@charsetclearclipclip-pathcolorcolumn-countcolumn-fillcolumn-gapcolumn-rulecolumn-rule-colorcolumn-rule-stylecolumn-rule-widthcolumn-spancolumn-widthcolumnscontentcounter-incrementcounter-resetcursordirectiondisplayempty-cellsfilterflexflex-basisflex-directionflex-flowflex-growflex-shrinkflex-wrapfloatfont@font-facefont-familyfont-feature-settingsfont-kerningfont-sizefont-size-adjustfont-stretchfont-stylefont-variantfont-variant-capsfont-weightgapgridgrid-areagrid-auto-columnsgrid-auto-flowgrid-auto-rowsgrid-columngrid-column-endgrid-column-gapgrid-column-startgrid-gapgrid-rowgrid-row-endgrid-row-gapgrid-row-startgrid-templategrid-template-areasgrid-template-columnsgrid-template-rowshanging-punctuationheighthyphens@importisolationjustify-content@keyframesleftletter-spacingline-heightlist-stylelist-style-imagelist-style-positionlist-style-typemarginmargin-bottommargin-leftmargin-rightmargin-topmax-heightmax-width@mediamin-heightmin-widthmix-blend-modeobject-fitobject-positionopacityorderoutlineoutline-coloroutline-offsetoutline-styleoutline-widthoverflowoverflow-xoverflow-ypaddingpadding-bottompadding-leftpadding-rightpadding-toppage-break-afterpage-break-beforepage-break-insideperspectiveperspective-originpointer-eventspositionquotesresizerightrow-gapscroll-behaviortab-sizetable-layouttext-aligntext-align-lasttext-decorationtext-decoration-colortext-decoration-linetext-decoration-styletext-indenttext-justifytext-overflowtext-shadowtext-transformtoptransformtransform-origintransform-styletransitiontransition-delaytransition-durationtransition-propertytransition-timing-functionunicode-bidiuser-selectvertical-alignvisibilitywhite-spacewidthword-breakword-spacingword-wrapwriting-modez-index
Атрибуты
| Атрибут | Значение | Описание |
|---|---|---|
| autofocus | autofocus | Указывает, что раскрывающийся список должен автоматически фокусироваться при загрузке страницы |
| disabled | disabled | Указывает, что раскрывающийся список должен быть отключен |
| form | form_id | Определяет, к какой форме относится раскрывающийся список |
| multiple | multiple | Указывает, что одновременно можно выбрать несколько параметров |
| name | name | Определяет имя раскрывающегося списка |
| required | required | Указывает, что пользователь должен выбрать значение перед отправкой формы |
| size | number | Определяет количество видимых параметров в раскрывающемся списке |
Еще примеры
Пример
Использование элемента <option> в <datalist>:
<label for=»browser»>Выберите свой браузер из списка:</label>
<input list=»browsers» name=»browser» id=»browser»>
<datalist id=»browsers»>
<option value=»Edge»>
<option value=»Firefox»>
<option value=»Chrome»>
<option value=»Opera»>
<option value=»Safari»>
</datalist>
Пример
Использование элемента <option> в <optgroup>:
<label for=»cars»>Выберите автомобиль:</label><select id=»cars»>
<optgroup label=»Шведские Автомобили»>
<option value=»volvo»>Вольво</option>
<option value=»saab»>Сааб</option>
</optgroup>
<optgroup label=»Немецкие Автомобили»>
<option value=»mercedes»>Мерседес</option>
<option value=»audi»>Ауди</option>
</optgroup>
</select>
CSS Element (type) selector
The CSS element selector selects HTML elements based on the element name. In HTML element names are things like , , or semantic names like or . Therefore, element selectors select all the HTML elements with the name you select.
Let’s look a CSS selector example for element selectors:
In the example above, we have selected all elements on the page that are of the type and and applied styles to those elements.
Element selectors help you keep your code simple by applying the styling to all elements on a page of that type. This means you only have to keep track of your styles for those elements in one place.